Everspring › Guides › Towers and specializations
Everspring towers and specializations
Everspring: Immortal Defense has 6 tower lines, each with 3 levels and 2 specializations: 12 endgame towers, 6 of them with an automatic ability. This page lists what each one costs and does at every level, and explains when each is worth the gold.
Updated 19 October 2026 · stats from the game's balance file, web version 0.3.28. Ranges are in map tiles; attack rate is shots per second. New to the game? Start with the beginner's guide.
How damage works: armor, magic resist and true damage
Every hit in Everspring is one of three kinds, and knowing which is which decides most fights.
- Physical damage (arrows, ballista bolts, treants) is cut by the target's armor. Armor is a percentage: an Orc Brute's 65% armor means an arrow that would deal 42 deals 14.7.
- Magic damage (Moonfire bolts, Frost Wells) ignores armor completely but is cut by magic resist. Most of the horde has none; the Orc Shaman resists 60%.
- True damage (Sunfire, burning, poison, the Thornguard's reflected thorns) ignores both. It also goes straight through the shield wall of Gorrak's Champion.
Two specializations bend those rules. The Sunpiercer Bastion ignores 60% of a target's armor, so that same Brute effectively has 26% armor against it. The Siegebreaker shreds armor by half for 4 seconds, which helps every physical tower that fires at the target afterwards.
All six tower lines at a glance
| Tower | Cost | Role | Hits air | Specializations |
|---|---|---|---|---|
| Ranger's Perch | 70 | Physical damage | Yes | Windrunner Roost / Sunpiercer Bastion |
| Moonfire Altar | 100 | Magic damage | Yes | Starfall Spire / Moonbinder Sanctum |
| Grove Warden | 90 | Summons treants that block the road | No | Ancient Grove / Thornguard Thicket |
| Frost Well | 85 | Magic damage | Yes | Glacial Heart / Permafrost Shrine |
| Dawn Ballista | 120 | Physical damage | No | Sunburst Engine / Siegebreaker |
| Spirit Beacon | 110 | Buffs nearby towers; does not attack | — | Warsong Beacon / Wellspring Shrine |
Ranger's Perch
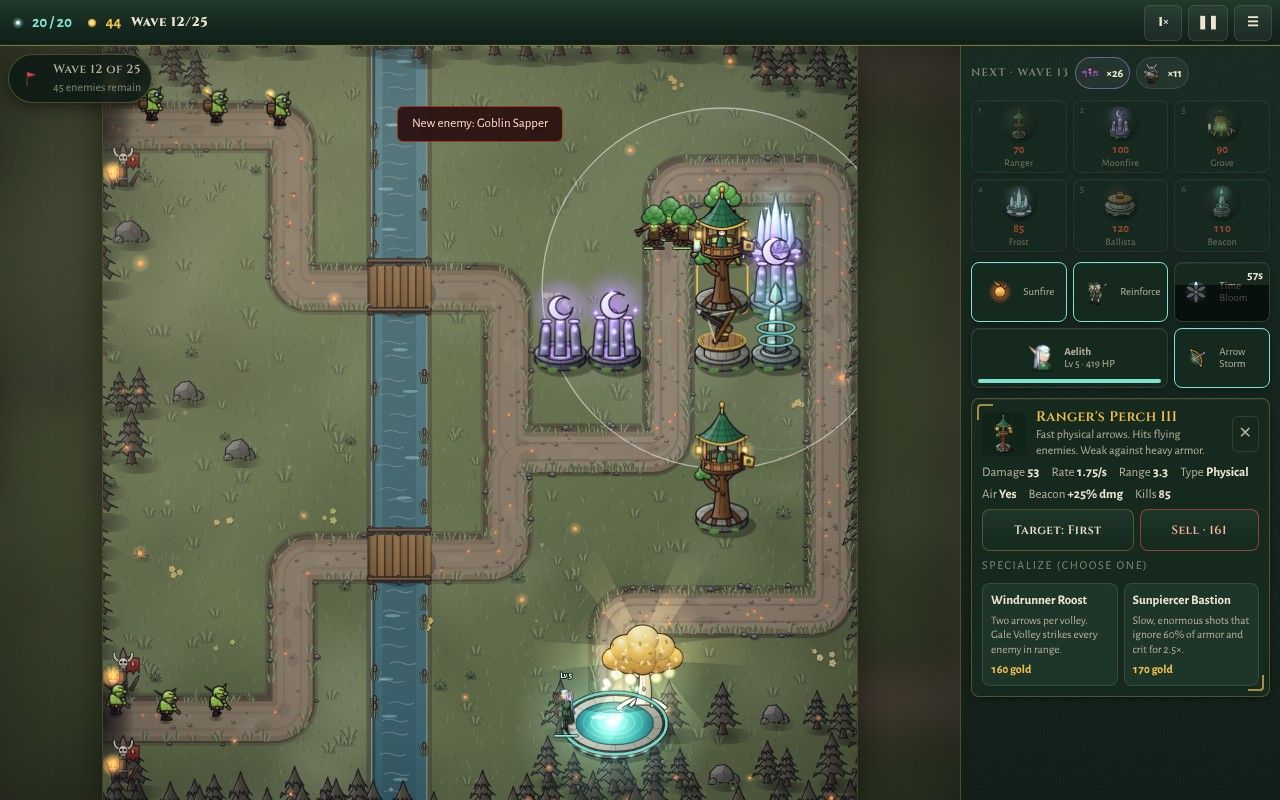
Build cost: 70 gold · Role: Shoots · Damage type: physical (reduced by armor) · Hits flying enemies: yes · Unlock: From the start
Fast physical arrows. Hits flying enemies. Weak against heavy armor.
| Level | Cost | Damage | Attack rate | Range | Extra |
|---|---|---|---|---|---|
| Level 1 | 70 gold | 11 | 1.5/s | 2.7 tiles | — |
| Level 2 | 65 gold | 24 | 1.6/s | 2.9 tiles | — |
| Level 3 | 95 gold | 42 | 1.75/s | 3.1 tiles | — |
Specializations (level 3, pick one)
| Specialization | Cost | Stats | What it does | Ability | Unlock |
|---|---|---|---|---|---|
| Windrunner Roost | 160 gold | 30 damage · 2.2/s · 3.2 tiles | Two arrows per volley. Gale Volley strikes every enemy in range. | Gale Volley (every 9 s) | From the start |
| Sunpiercer Bastion | 170 gold | 130 damage · 0.6/s · 4.2 tiles | Slow, enormous shots that ignore 60% of armor and crit for 2.5×. | None (passive) | Armory, 160 Essence |
When to build it: first, and often. It is the cheapest tower, it fires fastest, and it hits flying enemies, so a pair of Rangers on the first bends carries the opening waves of every road. Its weakness is armor: from wave 6, Orc Brutes take only 35% of its damage, so pair it with magic.
Windrunner Roost or Sunpiercer Bastion? The Windrunner fires two arrows per volley, and its Gale Volley hits every enemy in range for 40, so it shreds swarms of goblins and bats. The Sunpiercer fires one enormous shot every 1.7 seconds from 4.2 tiles, ignores 60% of armor and crits a quarter of the time for 2.5×; set it to target Strongest and it becomes your brute and boss killer. Most roads want one of each.
Moonfire Altar
Build cost: 100 gold · Role: Shoots · Damage type: magic (ignores armor, reduced by magic resist) · Hits flying enemies: yes · Unlock: From the start
Magic bolts that ignore armor. Hits flying enemies. Weak against shamans.
| Level | Cost | Damage | Attack rate | Range | Extra |
|---|---|---|---|---|---|
| Level 1 | 100 gold | 26 | 0.75/s | 2.5 tiles | — |
| Level 2 | 85 gold | 52 | 0.8/s | 2.6 tiles | — |
| Level 3 | 125 gold | 90 | 0.85/s | 2.8 tiles | — |
Specializations (level 3, pick one)
| Specialization | Cost | Stats | What it does | Ability | Unlock |
|---|---|---|---|---|---|
| Starfall Spire | 210 gold | 80 damage · 0.8/s · 2.9 tiles | Bolts burst in a 0.9-tile blast. Starfall drops a meteor on the strongest enemy. | Starfall (every 12 s) | From the start |
| Moonbinder Sanctum | 210 gold | 70 damage · 0.9/s · 2.8 tiles | Arcs of moonlight leap to 4 enemies. Moonbind roots four enemies in place. | Moonbind (every 10 s) | Armory, 200 Essence |
When to build it: before wave 6, when the first Orc Brutes arrive. Its bolts ignore armor, so it is the cheapest answer to brutes, warg riders and the Cave Troll's 45% armor. Keep it away from the job of killing shamans, which resist 60% of magic. On Moonwell Terraces the moonlight gives every Moonfire Altar 15% more range.
Starfall Spire or Moonbinder Sanctum? The Starfall Spire's bolts burst over 0.9 tiles and its meteor drops 180 damage on the strongest enemy every 12 seconds: build it where enemies bunch up. The Moonbinder's bolts leap to four enemies, and every 10 seconds Moonbind roots four of them in place for 1.5 seconds, which buys time for every tower around it.
Grove Warden
Build cost: 90 gold · Role: Summons treants that block the road · Hits flying enemies: no · Unlock: From the start
Summons treants that block the road and fight. Set their rally point on the path.
| Level | Cost | Treants | Damage | Armor | Respawn |
|---|---|---|---|---|---|
| Level 1 | 90 gold | 2 treants · 100 HP | 9 | 0% | 10 s |
| Level 2 | 75 gold | 2 treants · 190 HP | 14 | 5% | 10 s |
| Level 3 | 105 gold | 3 treants · 280 HP | 20 | 15% | 9 s |
Specializations (level 3, pick one)
| Specialization | Cost | Stats | What it does | Ability | Unlock |
|---|---|---|---|---|---|
| Ancient Grove | 190 gold | 3 treants · 480 HP · 30 damage · 30% armor | Three ancient treants with 30% armor and regeneration. Root Grasp holds enemies at the rally point. | Root Grasp (every 14 s) | From the start |
| Thornguard Thicket | 180 gold | 3 treants · 340 HP · 24 damage · 20% armor | Thorned treants reflect 40% of the damage they take and poison everything they hit. | None (passive) | Armory, 200 Essence |
When to build it: at a spot your damage towers already cover. Treants stand on the road at the tower's rally point (you can move it) and stop ground enemies while the towers around them do the killing. They cannot touch flying enemies, and a dead treant comes back after its respawn time. Keep Goblin Sappers, which explode for 60 when they die, from reaching them.
Ancient Grove or Thornguard Thicket? Ancient treants have 480 health, 30% armor and regenerate, and Root Grasp holds every enemy near the rally point for 2 seconds: the sturdiest wall in the game. Thornguard treants are softer but reflect 40% of the damage they take as true damage and poison what they hit, so the hardest-hitting orcs, like Berserkers and Brutes, hurt themselves on them.
Frost Well
Build cost: 85 gold · Role: Shoots · Damage type: magic (ignores armor, reduced by magic resist) · Hits flying enemies: yes · Unlock: Armory, 120 Essence
Frost bolts slow enemies. Low damage, huge control. Hits flying enemies.
| Level | Cost | Damage | Attack rate | Range | Extra |
|---|---|---|---|---|---|
| Level 1 | 85 gold | 9 | 1/s | 2.4 tiles | slows 35% for 2 s |
| Level 2 | 70 gold | 16 | 1/s | 2.5 tiles | slows 45% for 2 s |
| Level 3 | 100 gold | 26 | 1/s | 2.7 tiles | slows 50% for 2.2 s |
Specializations (level 3, pick one)
| Specialization | Cost | Stats | What it does | Ability | Unlock |
|---|---|---|---|---|---|
| Glacial Heart | 190 gold | 32 damage · 1/s · 2.8 tiles | Slows by 55%. Deep Freeze locks every enemy in range in ice for 1.3 s. | Deep Freeze (every 8 s) | From the start |
| Permafrost Shrine | 180 gold | 3-tile aura · 12 damage/s · slows 40% | No bolts: a 3-tile field of permanent cold. Everything inside is slowed 40% and takes frostbite damage. | None (passive) | Armory, 240 Essence |
When to build it: as soon as you own it, in front of your damage. A level-3 Frost Well slows everything it hits by half, so every other tower in range gets twice as long to work. It hits flying enemies and is the main answer to Warg Riders, which run at 1.9 tiles a second from wave 10. Warlord Gorrak resists half of every slow and Gorrak's Champion 30%.
Glacial Heart or Permafrost Shrine? The Glacial Heart slows by 55% and every 8 seconds its Deep Freeze locks every enemy in range in ice for 1.3 seconds. The Permafrost Shrine fires no bolts at all: it holds a 3-tile field that slows everything inside by 40% and deals 12 magic damage a second to all of it. Put the Shrine where the road doubles back on itself and the field covers two lanes.
Dawn Ballista
Build cost: 120 gold · Role: Shoots · Damage type: physical (reduced by armor) · Hits flying enemies: no · Unlock: Armory, 260 Essence
Heavy bolts that burst on impact, wrecking groups. Cannot hit flying enemies.
| Level | Cost | Damage | Attack rate | Range | Extra |
|---|---|---|---|---|---|
| Level 1 | 120 gold | 48 | 0.5/s | 3.2 tiles | 0.9-tile splash |
| Level 2 | 95 gold | 85 | 0.5/s | 3.3 tiles | 0.95-tile splash |
| Level 3 | 135 gold | 130 | 0.5/s | 3.4 tiles | 1-tile splash |
Specializations (level 3, pick one)
| Specialization | Cost | Stats | What it does | Ability | Unlock |
|---|---|---|---|---|---|
| Sunburst Engine | 230 gold | 170 damage · 0.5/s · 3.5 tiles | A 1.3-tile blast that sets everything on fire. Burning stops troll regeneration. | None (passive) | From the start |
| Siegebreaker | 230 gold | 480 damage · 0.33/s · 4.2 tiles | One colossal bolt every 3 s. Shreds armor by half and can reach flying enemies. | None (passive) | Armory, 300 Essence |
When to build it: where the horde bunches up — behind treants, at a fork's meeting point, or on the inside of a tight bend. Every bolt bursts and hits the whole group. It fires only once every 2 seconds and cannot hit flying enemies, so it needs Rangers or Moonfire beside it for bats and wyverns.
Sunburst Engine or Siegebreaker? The Sunburst Engine's 1.3-tile blast sets everything on fire for 18 true damage a second, and burning stops a Cave Troll's regeneration and goes through the Champion's shield wall. The Siegebreaker fires one 480-damage bolt every 3 seconds from 4.2 tiles, halves the target's armor for 4 seconds, and, unlike the rest of its line, can hit flying enemies. Late in Endless, when single enemies have thousands of health, the Siegebreaker is the one you want.
Spirit Beacon
Build cost: 110 gold · Role: Buffs nearby towers; does not attack · Unlock: Armory, 420 Essence
Empowers every tower within 2 tiles. Does not attack.
| Level | Cost | Damage buff | Range buff | Attack-speed buff | Aura radius |
|---|---|---|---|---|---|
| Level 1 | 110 gold | +15% damage | — | — | 2 tiles |
| Level 2 | 90 gold | +25% damage | +8% | — | 2 tiles |
| Level 3 | 120 gold | +35% damage | +12% | +10% | 2 tiles |
Specializations (level 3, pick one)
| Specialization | Cost | Stats | What it does | Ability | Unlock |
|---|---|---|---|---|---|
| Warsong Beacon | 210 gold | +50% damage · +15% range · +15% attack speed | +50% damage, +15% range and rate. Battle Hymn doubles attack speed for 4 s. | Battle Hymn (every 16 s) | From the start |
| Wellspring Shrine | 200 gold | +35% damage · +12% range · +10% attack speed | Keeps the aura and taps the Spring for gold: +4 every 4 s and +25 when a wave ends. | None (passive) | Armory, 300 Essence |
When to build it: when you have at least three damage towers within 2 tiles of one spot. The beacon does not attack; it boosts every tower in its aura. At level 3 that is +35% damage, +12% range and +10% attack speed, so ringed by four towers it adds more than a fifth tower would. A beacon with one tower beside it is wasted gold.
Warsong Beacon or Wellspring Shrine? The Warsong Beacon raises the aura to +50% damage and +15% range and attack speed, and every 16 seconds its Battle Hymn doubles the attack speed of everything nearby for 4 seconds. The Wellspring Shrine keeps the level-3 aura and also earns gold: 4 every 4 seconds and 25 more when each wave ends. Build the Shrine early in a long road and it pays for itself; build Warsong when you need raw damage now.
Choosing a specialization
A specialization is chosen once, at level 3, and costs a little more than building a new tower and giving it its first upgrade. Three questions settle almost every choice:
- Is the threat on this stretch of road many small enemies or a few big ones? Many small: Windrunner, Starfall, Sunburst. A few big: Sunpiercer, Siegebreaker.
- Do you need damage or time? If enemies leak because they are fast, buy time first: Glacial Heart, Permafrost, Moonbinder, Ancient Grove. Damage towers that have time do the rest.
- What does the boss wave need? The Cave Troll and Gorrak's Champion both fall to fire. Make sure at least one Sunburst Engine, or Sunfire with its cooldown ready, covers the last bend before the Spring.
Each tower line's second specialization has to be bought in the Armory before you can choose it: Sunpiercer 160 Essence, Moonbinder and Thornguard 200, Permafrost 240, Siegebreaker and Wellspring 300.
Layouts that work on each road
Wellspring Glade (20 waves)
One road with long bends. Two Rangers on the first two inside corners, a Moonfire Altar before wave 6, then a Grove Warden on a straight stretch both of them cover. Spend the rest on upgrades. If you have the Frost Well, put it before the last bend.
Ashen Crossing (25 waves)
Two roads cross the river and merge into one. Hold each lane cheaply with a Ranger, and put your real investment — a Ballista, a Beacon and its ring of towers — after the point where the roads meet, so every tower there sees the whole horde.
Root Halls (30 waves)
A long spiral into the center. Towers placed between the rings of the spiral reach two or three passes of the same road, which makes beacons and splash towers unusually strong here. The waves are big, so this is where the Dawn Ballista earns its place.
Moonwell Terraces (25 waves)
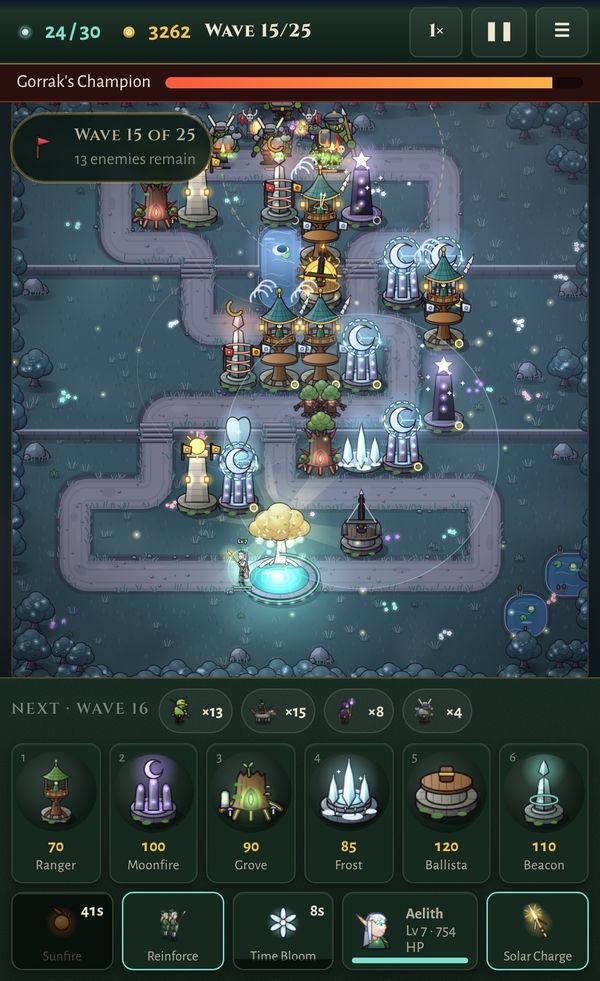
The road splits, meets again on the middle terrace beside the moonwell, and splits once more before the Spring. Build your center of gravity at the meeting point: Moonfire Altars there get the moonlight's 15% range bonus and see both branches. Gorrak's Champion leads waves 15, 20 and 25, so plan fire for him.